Starting Your Construction Document
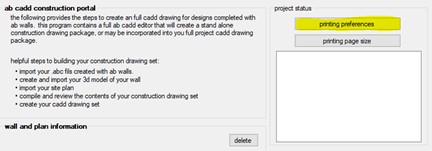
AB CADD Construction Portal
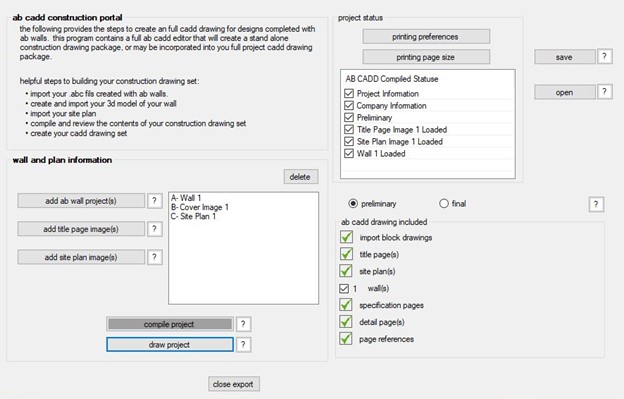
This portal will create a full CAD drawing for designs completed in the AB Walls Design Software. By following these simple steps, you will draw a complete set of construction drawings complete with Title Page, Site Plans, Retaining Wall designs in plan, elevation, and section views, along with reference specifications and typical details.
Prior to starting, you should have the following files saved in your project folder (these are described in detail in this help menu):
- Saved .abc files from the AB Walls Design Software
- 3D image of your retaining wall for the Title Page
- Image of your site with the walls numbered for the Site Plan Page
Saved .abc file from the AB Walls Design Software
- Complete your retaining wall design using AB Walls Design Software.
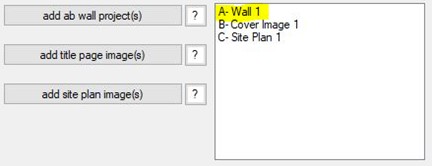
- The .abc file(s) will be loaded into the portal by clicking on the “Add AB Walls Project(s)” button and selecting the .abc file for your first wall.
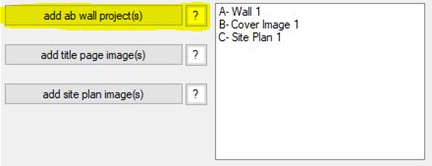
- Wall number will be listed in the information list to the left of the buttons.
- Additional walls can be loaded by following the same procedure.
- If you need assistance with the design, follow the AB Walls Help Menu or contact the Allan Block engineering department at engineering@allanblock.com.
3D Image of Your Retaining Wall for the Title Page
You can generate a 3D drawing of your retaining wall by using the tools from Allan Block. Here are some simple steps:
- In AB Walls – the File drop down menu has export features that includes 3-D Export (3-D Export Help Menu).
- This will create a .rb file that can be opened in the AB 3D Modeling Tool extension in SketchUp.
- Within SketchUp you:
- Use the Allan Block Textures Library to add colors, textures and patterns to the design in realistic visualizations.
- Combine Multiple Walls effortlessly in one 3D design to show terraced projects, raised patios with courtyard patio walls on top.
- Create stylish designs by using the Favorites Library - A collection of the most used Allan Block models and accessories without the time of searching SketchUp's vast library.
- Realistic and Accurate 3D models with wall composition details to better visualize the anatomy of the wall.
- Capture an image of your 3D rendering by using a snipping tool or screen capturing program and saving the file(s).
- The image is loaded by clicking the “Add Title Page Image(s)” button and selecting the appropriate file.
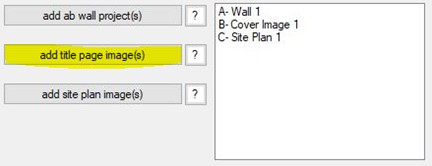
- 3D Image file will then be listed as Cover Image in the information list to the left of the buttons.
- Additional images can be loaded, and this will create multiple title pages within your Construction Drawings.
- If would like assistance in creating a 3D image of your project or schedule a tutorial, please contact us at salessupport@allanblock.com.
Image of Your Site with the Walls Numbered for the Site Plan Page
- Capture an image of your site plan with the numbered walls. An easy way to do this is to use a snipping tool to capture an image of your plan when tracing the walls in AB CADD Wall Manager.
- The image is loaded by clicking the “Add Site Plan Images(s)” button and selecting the appropriate file.
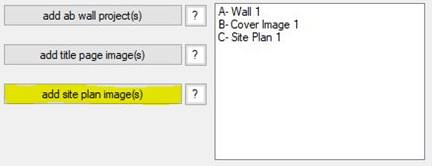
- Site Plan file will be listed in the information list to the left of the buttons.
- Additional site plan images can be loaded, and this will create multiple pages within your Construction Drawings.
Compile Project
- When you have all your information loaded, you will want to compile the project information, by clicking on the “Compile Project” button.
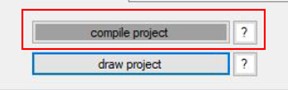
- This will update the AB CADD Compile Status list with checkmarks next to the project information and documents.
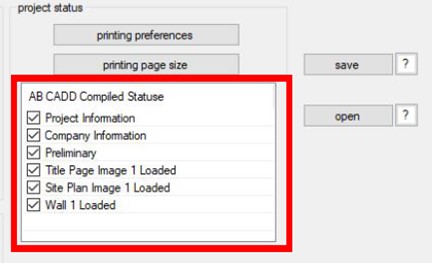
- Each item in the list needs to be checked before proceeding to the next step of drawing the construction documents.
Draw Project
- When you have all your information complied, you will want to draw the project, by clicking on the “Draw Project” button.
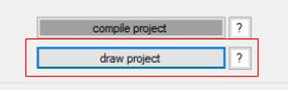
- This will start drawing your construction drawings and creating the complete document. This may take several minutes. We have provided a status list that will check off the items as they are drawn with a green check mark.
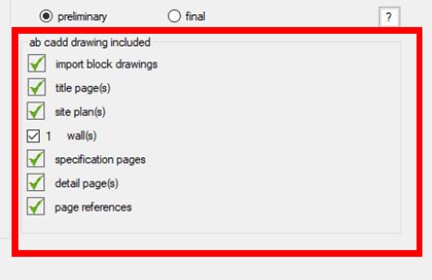
- AB CADD Construction Portal allows you to remove walls from the final drawings by simply unchecking the box next to the wall numbers in the AB CADD Drawing Included list.
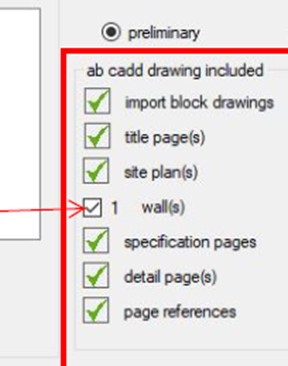
Preliminary / Final
- You can keep the Preliminary Concept Drawing information on the drawings, which is the default setting by keeping that selected.
- However, you can finalize your drawing complete with the Professional Engineering Stamp and Information from AB Walls, by selecting the “Final” option.

- This can be done at any time and the drawings will be updated by activating the appropriate layer within the drawing.
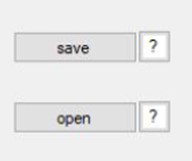
Save / Open
- SAVE – use this button to save all the information the AB CADD Construction Portal needs for future use. Using the save command within the CAD Editor program will save the drawings, but it will not save all the loaded information and images. Always use this save command.
- OPEN – Use this command to open past projects you created in the AB CADD Construction Portal. Using the open command within the CAD Editor may open the drawing but will not have the information allowing for easy changes. Always use this open command.
Printing Preferences
- When you click the “Printing Preferences” button it will activate the preferences screen.
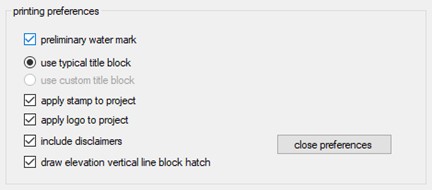
- Preliminary Water Mark – default setting and includes the “Preliminary Concept Drawing Not for Construction” on each page of the construction drawings.
- Use Typical Title Block – the standard title block is used that includes space for logos, stamps and project information. Future enhancements will allow the user to customize the title block.
- Apply Stamp to Project – takes the professional engineering information that is saved in the AB Walls Design Software and brings it into the title block of the construction drawings.
- Apply Logo to Project – takes the company logo information that is saved in the AB Walls Design Software and brings it into the title block of the construction drawings.
- Include Disclaimers – brings the standard disclaimers within the AB Walls Design Software into the notes and specification section of the construction drawings.
- Draw Elevation Vertical Line Block Hatch – the default setting is to include the vertical lines on the elevation and panel view to represent the individual Allan Block. For larger walls, you can remove them which will draw the elevation and panel views faster.
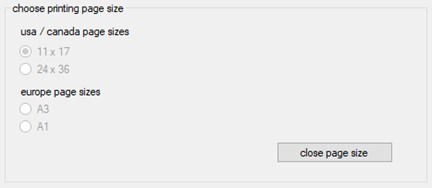
Printing Page Size
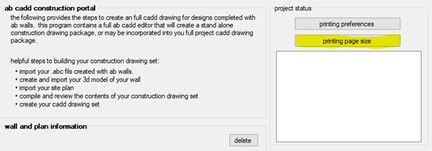
- Future updates will allow you to select the page size for your construction drawings. Default settings are for an 11x17 document.