Go green and help the environment while making an attractive and functional compost bin. The AB Courtyard Collection is versatile enough to create a larger compost bin to take care of your recycling needs in just a weekend.
Video: How to Build a Compost Bin
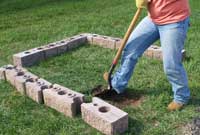
Mark the location for the bin
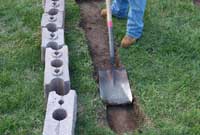
Dig the Trench
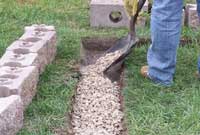
Fill the Trench With Wall Rock
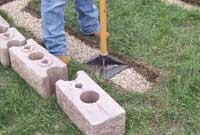
Compact the Foundation Pad
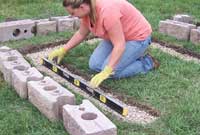
Level the Foundation Pad
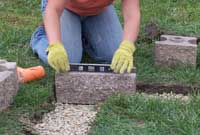
Level the First Block
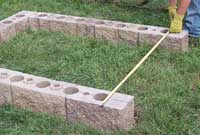
Check the Dimensions
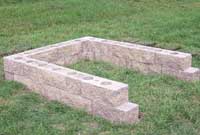
Build the Second Course
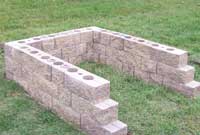
Build the Third Course
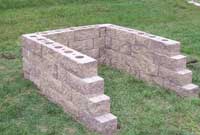
Build the Fourth Course
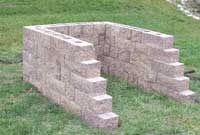
Build the Last Course
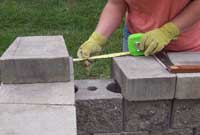
Measure the Cap Spacing
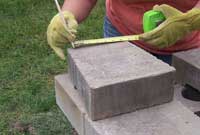
Measure & Mark the Cap
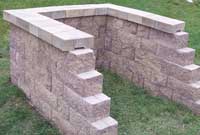
Finish with Wall Caps
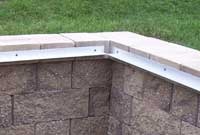
Assemble Cover Brackets
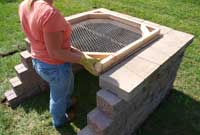
Set Lid in Place
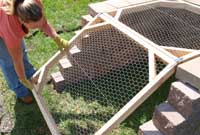
And Your Compost Bin is Complete
Approximate Dimensions
34 in. H x 70 in. D x 55 in. W
(0.9 m H x 1.8 m D x 1.4 m W)
Materials Needed:
Compost Bin Assembly
- 36 AB York Blocks
- 12 AB Dublin Blocks
- 20 Corner Blocks
- 17 Wall Caps
- 5-50 lb(23 kg)Bags Base Rock
- 3 Aluminum Angle Pieces
1.5 in x 36 in and 1/8 in. thick
(40 mm x 915 mm and 3 mm)
- 9 Concrete Anchors
Bin Lid Assembly
- 4 Wood Studs
2 in. x 3 in. x 8 ft
(50 mm x 75 mm x 2.5 m)
- 1 Roll Wire Mesh
(Chicken Wire)
- Hammer and Nails or Exterior Deck Screws
(for frame assembly)
- Staple Gun and Staples
- 2 Outdoor Hinges
Tools Needed:
- Square
- Shovel
- Level
- Hand Compactor
- Measuring Tape
- Circular Saw (Masonry Blade)
- Dead Blow Hammer
- Hammer & Chisel
- Safety Glasses
- Dust Mask
- Work Gloves
Step 1: Choose Where To Build
Determine the location of your compost bin and lay out the first course of blocks using the pattern in Layout 1 to determine the shape of your bin and establish where to dig the trench. Once you have your layout, check to make sure the blocks are square by measuring diagonally from each back corner to the opposing front corner before digging the foundation pad trench.
Step 2: Mark the Location
Mark the location of the walls with a shovel, remove the blocks and sod, and dig a level trench that is 3 in. (75 mm) deep and 7 in. (178 mm) wide. Place 3 in. (75 mm) of base rock in the trench and compact using a hand tamper.
*Note: The soil beneath the foundation pad must be a good quality compactable material. If soft soils are encountered, they will need to be removed and replaced with additional base rock. A good foundation will ensure a stable wall for years to come.
Step 3: Level The Trench
Level the base trench. Make any adjustments as needed by adding or removing base rock.
Base Rock: Using the proper materials to create the base foundation for the panels is important when building on soil. We recommend using a compactible base rock material that is gravel in varying sizes of angular or smooth aggregates similar to the wall rock used in retaining walls or a road/ paver base type material.
Step 4: Build the First Course
Once you have a level foundation, you can begin building the first course of your compost bin. Using the pattern in Layout 1, start with the corner block on the back wall. Each course will require an AB York or an AB Dublin block to be cut or split. Learn more about cutting and splitting blocks.
Place each block and check for level from front to back and side to side before placing the next block. This will ensure that the blocks will line up properly, and help keep them level with each other.
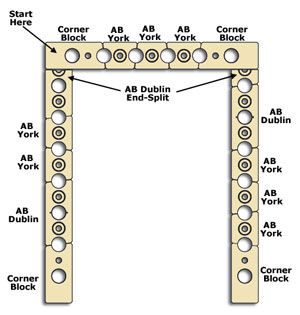 Layout 1
Step 5: Check the Dimensions
Once the first course is installed, use a measuring tape to check the width of your compost bin from the front and the back and make sure it is square by measuring diagonally from each back corner to the opposing front corner.
Step 6: Build the Second Course
Begin the second course at the corner following the pattern in Layout 2. Adjust the blocks as necessary to ensure that they line up properly.
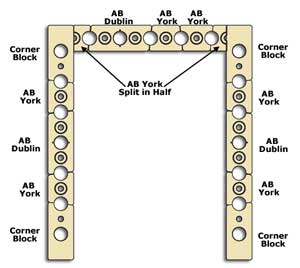 Layout 2
Step 7: Build Additional Courses
Continue stacking courses of blocks following Layouts 3-5. Adjusting the blocks as necessary as you stack them up.
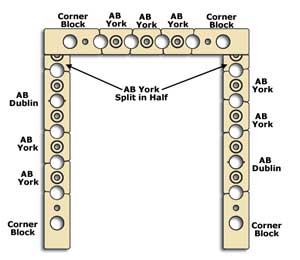
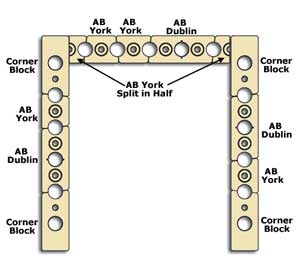 Layout 3 Layout 4
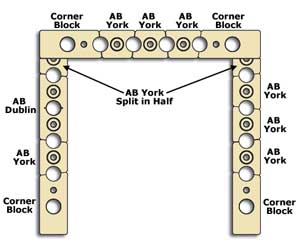 Layout 5
Step 8: Finish with Wall Caps
Finish the walls with Wall Caps. You will want to place caps on the outside walls first then complete the back wall. There will be a small gap in the back wall. Two caps will need to be cut to complete the back wall. Starting at the corner on the first outside wall, place the first cap on so that you have a slight overhang off the back wall. This will ensure that the caps along the back wall line up with the corners. Alternate the direction of each Wall Cap as you move down the outside wall. The caps will end before the end of the wall, leaving a portion of the corner block exposed to continue that staggered look. Repeat this on the second outside wall.
Now you are ready to cap the back wall. Place three caps on the back wall adjusting their placement to ensure an even overhang. You will need to cut two caps to fill in the gap on either end of the back wall. To do this, center the three caps so that there is an equal sized gap on each side of the back wall. Measure the distance of the first gap (from the corner cap to the first cap on the back wall). Mark this distance on the cap to be cut. Using a saw with a masonry blade, cut the cap to the desired dimension. For more information on cutting and splitting block see How to sheet #210. Repeat this process to fill in the gap at the other end of the back wall.
Once the caps are cut, secure all the wall caps in place with a bead of masonry adhesive along both sides of the raised rings and along the sides of each wall cap. Allow this to dry completely before moving on to Step 9.
Step 9: Complete Bin Cover
The next step is to complete the compost bin cover. This cover will keep any wildlife from taking up residence in your compost, while still allowing air to filter though.
Step 10: Attach the Bin Cover
Use aluminum or galvanized steel angles to attach the cover to the bin. Cut the pieces to size. Use a drill with an masonry bit and masonry screws to attach the angles to the sides of the Wall Caps on each side of the compost bin. Use a minimum of 3 screws for each angle piece. This will create a shelf for the lid to rest on that will make the lid easy to remove when needed.
Step 11: Building a Compost Bin Lid
A rodent-resistant bin has a secure top and bottom, and no holes larger than 1/4 inch (6 mm). The most rodent resistant bins are enclosed in 1/4 inch (6 mm) wire mesh. In this example, we have constructed a less restrictive bin using a hinged wooden frame with chicken wire screening (found at your local hardware or garden supply store).
Step 12: Constructing the Frame
Begin your compost lid by constructing 2 lid frames using the layouts below. Use 2 in. x 3 in. (50 mm x 75 mm) wood studs to construct. One side of each lid frame is designated to be the hinge side. This piece of wood will need to be cut at an angle so the hinges will move properly once assembled (see Figure 1).
Step 13: Complete the Lid
Once the lid frames are assembled and before you hinge them together, stretch the wire mesh over the frame and staple it into place. Attach the hinges to the hinge side of each frame and secure them together. Your cover is now ready to be set in place. Simply slide the cover on the angle pieces installed earlier and flip the lid down. Now you are ready to fill with composting materials and live green.