Corners & Angles vs. Curves
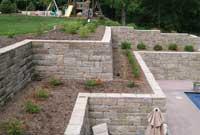
AB Europa retaining wall with corners
Corners and Angles typically require custom cutting of the blocks. Try to design curves instead. Angled retaining walls are not as stable as curved retaining walls.
Whenever possible we recommend using curves instead of corners for a smooth flowing look to your landscape. If you need to use corners in your design, follow the instructions below:
Corners with AB, AB Aztec, AB Metropolitan or the AB Europa Collections
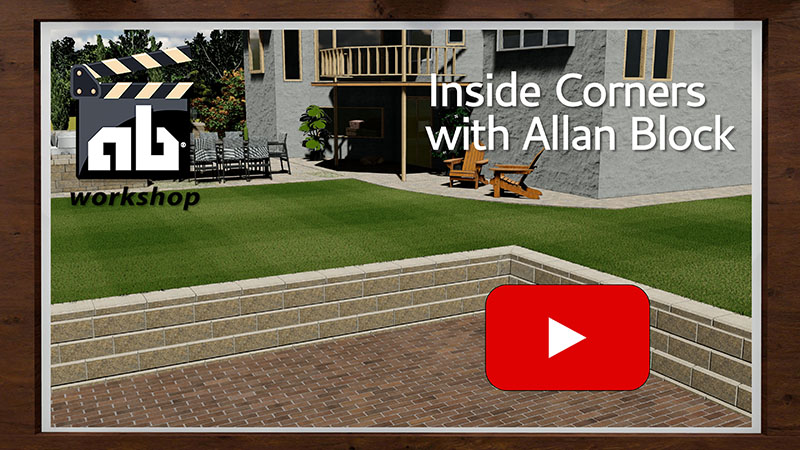
Video: How to build an inside
corner in a retaining wall
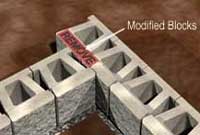
Remove raised front lip from block
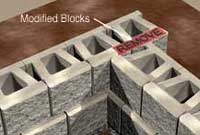
Remove 1/3 of raised front lip
from block
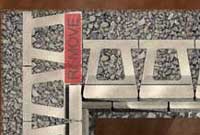
Modify retaining wall blocks to
make corner
If you are building with AB Fieldstone that uses recycled materials, go to Fieldstone installation
Our example uses an AB Jumbo Junior, but can be used with any block.
Inside Corners
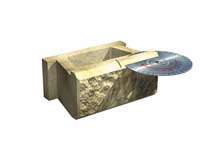
Remove raised front lip of block
Inside corners are easily constructed using standard Allan Block units. By removing part of the lip with a chisel or saw, the blocks can be overlapped for a strong interlock. If your retaining wall needs reinforcement, follow the instructions for adding grid to corners.
- Using your saw or chisel, remove the raised lip from one block, and 1/3 from the left side of another. Set them in place at the beginning of the base course.
- Locate the adjoining retaining wall so that the raised lip on the modified block is lined up with the raised lips on the opposite retaining wall. Finish installing the entire base course in both directions.
- Modify two more blocks, this time remove the raised lip from one block, and the right third from another. Use these blocks to start the second course.
- Continue the process to the top of the retaining wall, alternating as you go.
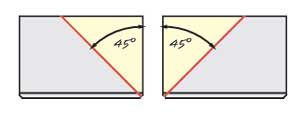
Cut caps at 45 degree angles
- Cut caps at 45 degree angles to complete the inside corner and give the retaining wall a custom finished look. It's a good idea to secure caps with a high strength construction adhesive once they are all cut.
More options for finishing your retaining wall.
Outside Corners
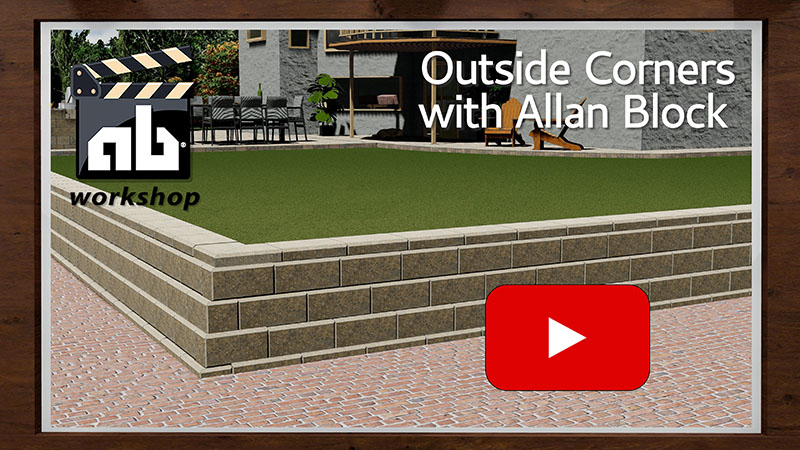
Outside corners take more time and skill, but AB Corner Blocks are all you need to make an outside corner. Always build your retaining walls by starting at the corners and working out. AB Corner Blocks are manufactured with a 12° (Ref) setback. With some minor adjustments, the blocks can work with any setback. See AB Tech Sheet #298 (Using the One Piece AB Corner Block) for more details.
- Set the first corner block in place and install the two perpendicular base courses. Level, backfill and compact.
- Place an alternating corner block on the second course and set the entire second course of block in both directions. Level, backfill and compact again.

Cut caps at 45 degree angles
- Repeat as often as needed to the top of the retaining wall.
- Cut caps at 45 degree angles to complete the inside corner and give the wall a custom finished look. It's a good idea to secure caps with a high strength construction adhesive once they are all cut.
More options for finishing your retaining wall.
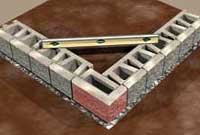
Place corner block and build out
in both directions
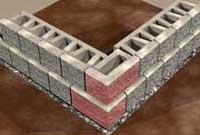
Alternate the corner block
direction
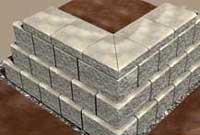
Finish wall with capstones
Corners with Reinforcement
Installing Geogrid on Inside 90° Corners
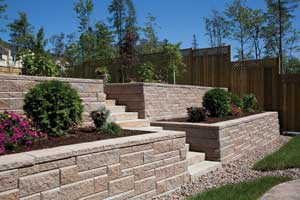
AB retaining wall with corners
- EXAMPLE:
- Finished wall height is 6 ft. (1.8 m), divide by 4 which equals 1.5 ft. (0.45 m).
- The length the geogrid will need to extend past the corner is 1.5 ft. (0.45 m).
On inside corners additional geogrid is required to extend past the end of the retaining wall 25% of the completed wall height.
- Roll out the AB Reinforcement Grid behind the blocks, keeping the edge of the geogrid tight against the front lip of the blocks. Extend the geogrid past the inside corner by at least 25% of the wall height in one direction.
- Place an alternating corner block on the second course and set the entire second course of block in both directions. Level, backfill and compact again.
- On the next course of block where geogrid is required extend the geogrid past the inside corner in the opposite direction. Never place geogrid directly on top of another layer of geogrid.
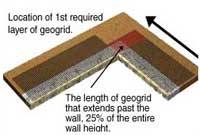
Geogrid on Inside 90° Corners
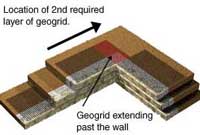
Geogrid on Inside 90° Corners
Installing Geogrid on Outside 90° Corners
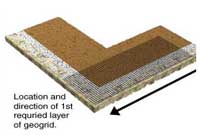
Geogrid on Outside 90° Corners
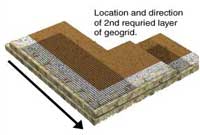
Geogrid on Outside 90° Corners
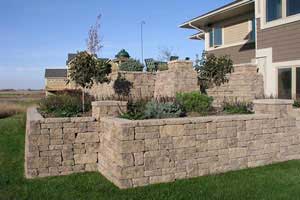
AB Europa retaining wall with corners
Each side of the corner must be reinforced independently from each other.
- Roll out the AB Reinforcement Grid to the outside corner in one direction. Never place geogrid directly on top of another layer of geogrid.
- On the next course of block where geogrid is required, lay the next layer of geogrid perpendicular to the previous layer. Using AB Reinforcement Grid you will not need a layer of geogrid on every course due to its biaxial strength.
Corners With AB Fieldstone Walls
One of every four AB Fielstone facing units double as corner blocks. One side is textured similar to the face.The built-in corner within the 812 facing units make it easy to create corners within the project.
Inside Corners with AB Fieldstone
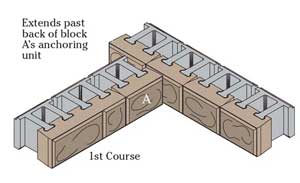
AB Fieldstone inside corner 1st course
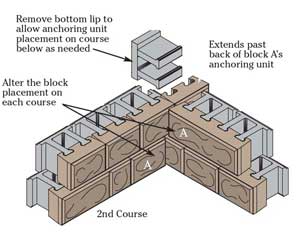
AB Fieldstone inside corner 2nd course
By alternating the block’s placement on each course of the retaining wall, an inside corner can be installed. The 824 facing units are ideal for this task, but 812 facing units are acceptable.
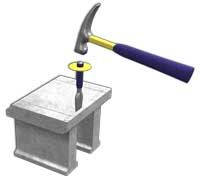
Remove lip from AB Fieldstone block
- To create a 90° inside corner, begin by placing an AB Fieldstone facing unit (A) at the corner. Then lay a second facing unit (B) perpendicular to the first. This second unit (B) must extend past the back of the first facing unit (A). Continue laying out the rest of the base course working from the corner out in both directions. Install the anchoring units.
- On additional courses alternate the placement of the facing units. Remove the lip from the anchoring unit, where the anchoring unit sits on the facing unit below as needed.
- Cut caps at 45 degree angles to complete the inside corner and give the wall a custom finished look.
More options for finishing your retaining wall.
Outside Corners with AB Fieldstone
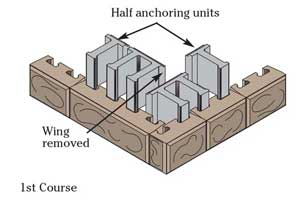
AB Fieldstone outside corner
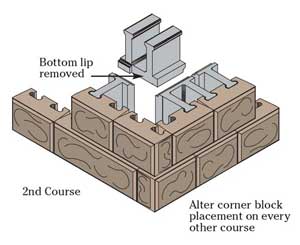
AB Fieldstone outside corner
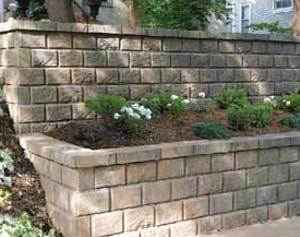
AB Fieldstone retaining wall with corners
Some of the AB Fieldstone facing units are manufactured with a textured side that compliments the facing unit. Besides being used as a standard block, these blocks can be used to create a corner. To create a left or right hand corner simply flip the facing unit as needed to change the direction.
- Whenever possible, begin your wall at the corner. Install a corner facing unit with the textured end facing out at the corner. Install an additional facing unit perpendicular to create a corner. Install a bead of flexible concrete adhesive between them to hold in place during construction (optional). Install additional facing units in both directions to continue down the wall. Check for level.
- Starting at the corner and working out in both directions, use anchoring units to span the first two facing units in each direction. (Step 2) Both of these anchoring units will need to be modified slightly. On the base course and above remove the wing from one anchoring unit. From course two and above, remove part of the lip off the other anchoring unit so that it fits on top of the course below. More information on modifying an anchoring unit.
- Use half of an anchoring unit on either side of the spanning anchoring units to get pattern back to each facing unit having its own anchoring unit.
- Align the lip and notch of the anchoring units in each direction to ensure proper placement of next wall course.
- Cut caps at 45 degree angles to complete the outside corner and give the wall a custom finished look.
More options for finishing your retaining wall.

