Curves & Serpentines
Whether you choose soft curved retaining walls or classic straight retaining walls, Allan Block has the system to satisfy every design.
Curves accent any landscape, are simple to design and easy to build. Consider how tight or gentle you want the curves to be and choose the block or combination of blocks that are best suited for your design. See the radius chart for more information.
Determining the Radius
Curves accent and design
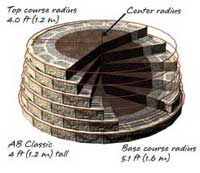
Curved walls have a greater setback, which causes a coning effect to occur causing your retaining wall to have its tightest radius at the top of the wall which in turn creates the need for a larger radius at the base course.
The final height of the wall will determine what the minimum radius at the base course must be. Use the radius chart to determine what the minimum recommended radius of the base course of the wall needs to be, so the top course of the wall will not be less than 4 ft. (1.2 m).
Depending on the block you choose, the tightest radius at the top of the retaining wall is:
- AB, AB Aztec, AB Metropolitan or AB Europa Collection
- Full size block is 4 ft. (1.2 m), half width block is 2.5 ft. (0.8 m).
- AB Fieldstone Collection
- The 812 assembly with a short anchoring unit is 5.25 ft. (1.6 m).
Starting the Curve
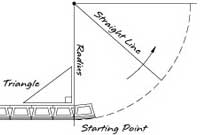
How to start a curve
From the point of where the curve will start, measure straight back from the wall the required amount (shown in the radius chart) and drive a stake into the ground. This will be the center of the curve. Attach a string line to the stake the length of the radius and rotate it around to mark the location of the base course. Install the blocks with the front of the blocks lining up with the mark.
- To transition the curve back into a straight wall or another curve, lay out the curve and the first couple blocks of the next section. Adjusting 1 or 2 of the blocks will help in the transition of the next section of the retaining wall.
For AB, AB Aztec & AB Europa Walls
Building Tighter Curves with AB or AB Europa Walls
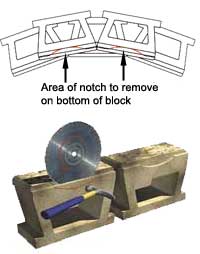
Cutting the bottom notch for tighter inside curves
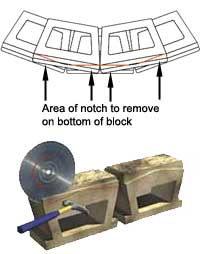
Cutting the bottom notch for tighter outside curves
- Use the AB Jumbo Junior, AB Aztec Junior or the AB Palermo whenever possible to build tighter curves within the wall
- When using full size blocks, it may be necessary to remove parts of the bottom notch to fit the blocks closer together.
Curves with Reinforcement
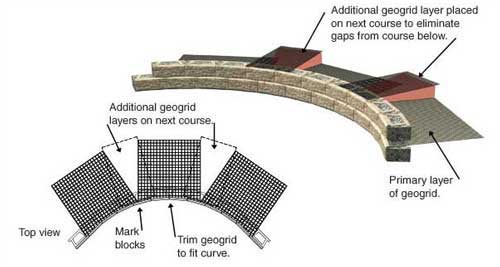
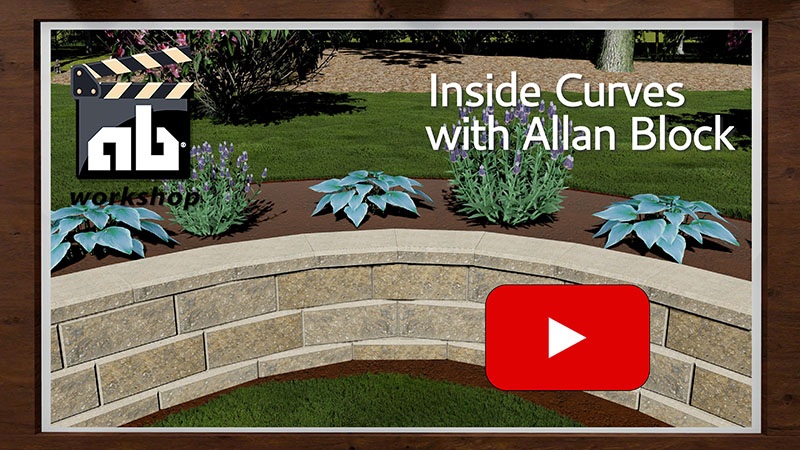
Inside Curves with Geogrid
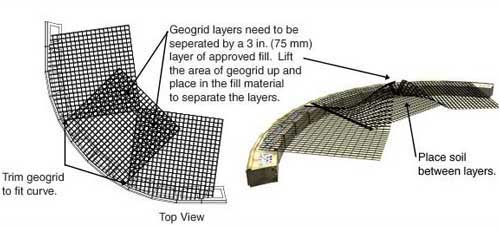
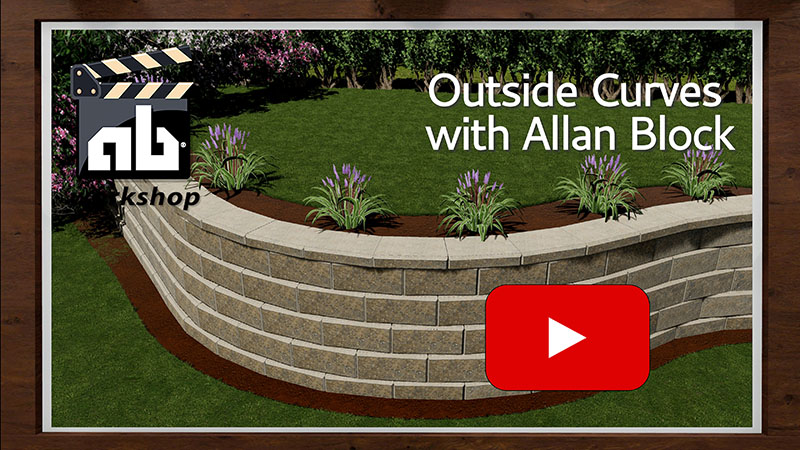
Outside Curves with Geogrid
When placing geogrid along curved walls, the geogrid should follow the back of the lip on the retaining wall block. Simply slit the geogrid with a utility knife and either feather out or overlap to follow the curve.
Inside Curves and Geogrid
Geogrid needs to have 100% coverage around any curve. To achieve this, additional layers need to be installed above the course where the geogrid is required to fill voids that are created.
- Roll out the AB Reinforcement Grid behind the wall, keeping the edge of the geogrid tight against the front of the blocks. Voids will appear between the pieces at the back. Trim the geogrid to fit along the front lip of the blocks.
- Mark the blocks or take note of the areas where the voids are in the geogrid placement.
- On the next course of block, place geogrid over the marked areas covering the voids.
- On patterned walls, fit the grid through the coursing as best as possible to fill the void from the course below.
Outside Curves and Geogrid
- Roll out the AB Reinforcement Grid around the curve. Trim to fit along the front lip of the blocks.
- Lift the section of geogrid that overlaps and place infill material to separate. Geogrid layers need to be separated by a 3 in. (75 mm) layer of infill or approved on-site soils.
- Never compact directly on the geogrid.
- Geogrid must cover the entire curved area.
Capping Curves

Place two caps on top of the wall, spaced so a third cap will fit tightly between their widest point

Mark the overlap on the bottom of the center cap

Cut cap on marks to fit between caps

Measure the distance of the gap between the 2 caps (x) at the front of the wall
If you are using AB Fieldstone, follow instructions on capping AB Fieldstone.
- Place two caps on top of the wall, spaced so a third cap will fit tightly between their widest point.
- Set another cap on top of the first two caps in the center and mark where they overlap on the bottom of the center cap.
- Remove the center cap and cut along the marks. Then set in place so the three fit tightly together.
- Repeat this process as often as needed to cap the entire curve.
- It's a good idea to secure caps with a high strength construction adhesive once they are all cut.
More options for finishing your retaining wall.
Capping Tighter Curves
If you are using AB Fieldstone, follow instructions on capping AB Fieldstone.
- For an outside radius, place two caps on top of the wall, with the back of each cap tight together. A gap will appear in the front.
- Measure the distance of the gap between the 2 caps (x) at the front of the wall.
- Measure out this distance (x/2) on the back of each of the cap and mark.
- Draw a line from the mark to the front corner.
- Use a masonry saw to cut each cap.
- The above steps work for both inside and outside radiuses.
More options for finishing your retaining wall.
For AB Fieldstone Walls
Outside Curves with AB Fieldstone
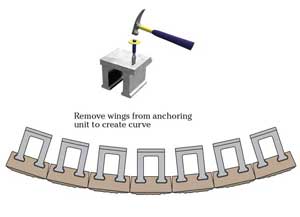
Outside Curve
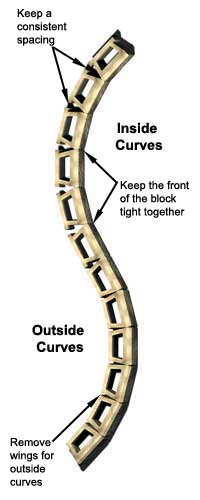
On outside curves, remove one or both of the wings from the anchoring unit to for the curve desired. Use the radius chart to determine the minimum radius on the base course.
Inside Curves with AB Fieldstone

Inside Curve
On inside curves, place the facing units to form the curve. Keep the front of the blocks tight together.

