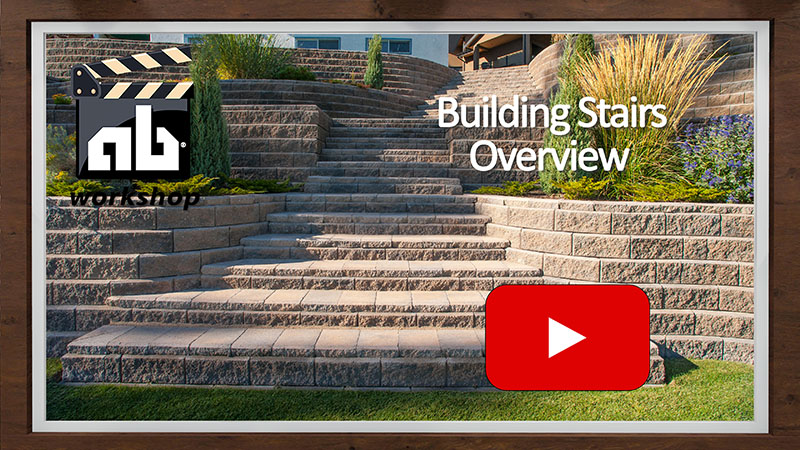
Stairs can be easily designed with flowing curves or with right angles. The simplest stair designs are built using curves. Allow for extra time for laying out and building your stairs.
Making Stair Construction Simple
The steps shown here are general guidelines for building stairways. By understanding the basic installation elements, stairways can be easily incorporated into the retaining wall installation. Always check local code requirements before building any type of stair application.
Stair Design
Allan Block Wall Systems offer a variety of options for stairways
Stairs can be designed with flowing curves or straight lines. Curved sidewalls create a softer, natural look. Straight sidewalls and corners offer a crisp, traditional style; however they require AB Corner Blocks and take more time and custom cutting to build.
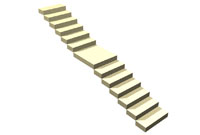
Break up long sets of steps with landings
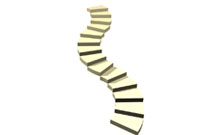
Add switchback curves to meander up the hill
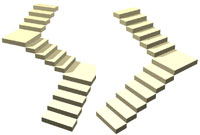
Drop in a turn and a landing to break the stair line
How Many Steps Do I Need?
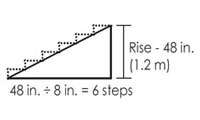
how many steps do I need?
To find the number of steps needed, measure the total rise of your slope in inches and divide by 8 in. (200 mm) - the approximate height of a block.*
*Check with your local Allan Block Dealer for exact specifications.
Tackle Your Slope
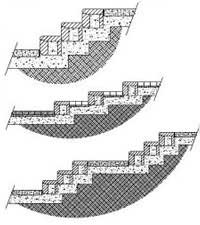
Match your stair design to your slope type
Match your stairway design to the natural grade of your slope.
- On steep slopes, keep the blocks tight together. With Allan Block, you get an 8 in. rise and a 12 in. run. (200 mm rise and a 300 mm run).*
- On gentle slopes, add pavers or other materials to increase the depth of the tread and length of the run.
- Landings can soften a long stairway and provide an easy way to tie sets of steps together.
Take Time to Build in Quality
Building stairs and steps requires careful planning, flexibility on the job site and an eye for detail. Be sure to allow adequate time for layout and building of stairs.
Stair Building Basics
Many stair design variations are possible. Stair layout for rise and run needs to be calculated with consideration to the stair tread that best suits your application.
Determine Stair Riser Locations
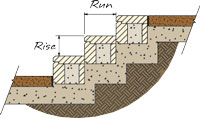
Determine stair riser locations
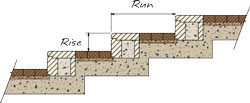
Good compaction is required
Once the number of steps has been determined and the type of stair tread has been selected, excavate the stair location based on the rise and run.
- Mark the center of the stairway where the base stair riser will be placed. In this example the first stair riser is the continuation of the base course of the retaining wall that the stairs are being built into.
- Each stair riser will need a minimum of 6 in. (150 mm) of base material under it that extends a minimum of 6 in. (150 mm) behind the retaining wall block.
- Make adjustments as needed so that the first riser is not more than 8 in. (200 mm) high with stair tread material and final grading in place.
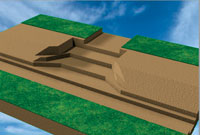
Excavate the base trench and stair location
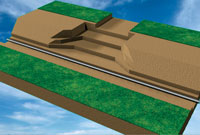
Install the drain pipe

Backfill and compact base material

Install base course of retaining wall
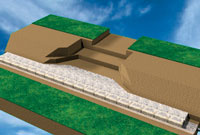
Add wall rock to retaining wall and compact
Excavate the Base Trench and Stair Location
- From the base stair riser location mark the remainder of the stair risers and remove the soil to meet the base material requirements. If more soil was removed than necessary during excavation, replace it with wall rock during the building process. Any excavated soils that are replaced will need to be properly compacted. If organic or wet soils are present in the base trench they must be removed and replaced with granular material.
- After the stair location has been excavated, you will prepare your base and base course just like any other wall. How to dig a base trench to the appropriate size.
- Compact the base trench making a minimum of two passes with a plate compactor.
- If a drain pipe is required in your project, continue the placement of the pipe in the trench for the base course. Learn where to place the pipe.
- Place a minimum of 6 in. (150 mm) of wall rock in the base trench and rake smooth.
- Compact the wall rock making a minimum of two passes with a plate compactor.
- Check for level, and adjust as needed. More information on basic retaining wall installation.
Drain Pipe
If drain pipe is being used on your project, continue it behind the stairs at the lowest point of elevation. Do not interrupt the drain pipe at stair locations.
Install the Base Course
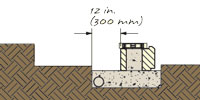
Level retaining wall blocks on base
- Place the retaining wall blocks with the raised front lip facing up and near the front of the trench.
- Check the retaining wall blocks for level from side-to-side and front-to-back. Verify the proper position of the base course by examining a string line across the back of the blocks. Make adjustments as necessary.
- Fill in the area in front of the blocks with on-site soils. This will keep the base course blocks from shifting while filling and compacting.
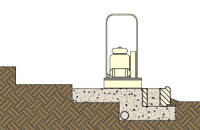
Compact the stair tread area
- Fill the hollow cores and at least 12 in. (300 mm) behind the blocks or more to accommodate the next stair riser with wall rock.
- Use infill or approved on-site soils to fill in any additional areas behind the wall rock. The stair tread area must be level with the top of the base course of blocks.
- Use a plate compactor to compact the wall rock starting directly behind the block and working in a path parallel to the wall, working from the back of the block, over the stair tread area, to the back of the excavated area. Always compact in 8in. (200 mm) lifts or less.
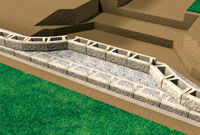
Align first stair riser
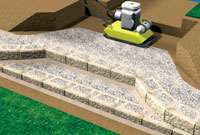
Backfill and compact stair riser
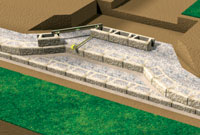
Install next stair riser
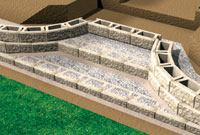
Install retaining wall out from stairs
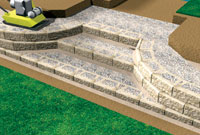
Backfill and compact retaining wall and stair risers
Install First Stair Riser
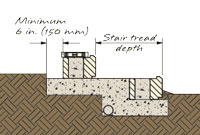
Stair riser placement
- Measure the distance for the placement of the first stair riser making sure that the blocks are parallel with the base course in front. Place the blocks on top of the compacted stair tread area making sure to allow for 6 in. (150 mm) of wall rock behind the blocks.
- To ensure that the blocks will be level with the corresponding wall, place a block on the wall as a reference point and level from that block to the block being used for the stair treads.
- Level and adjust as necessary.
- To curve the wall out from the stair location, break the wings off the backs of blocks and place them tight together, following the layout on your approved plans.
Backfill and Compact
- Fill in the area in front of the first stair riser with a small amount of wall rock. This will keep the blocks from shifting while filling and compacting.
- Fill the hollow cores and at least 12 in. (300 mm) behind the blocks or enough to accommodate the next stair riser with wall rock.
- Then compact and level the wall rock as previously done.
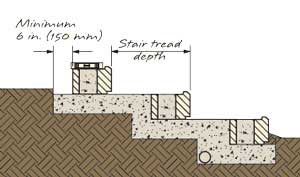
Additional stair riser placement
Additional Steps
- Repeat these steps for each stair riser.
- Once all the steps are in place, install the selected stair tread material to finish your stairway.
Stair Building with AB Fieldstone
Stairs with AB Fieldstone
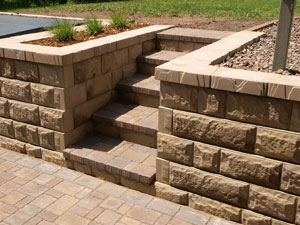
AB Fieldstone Stairs
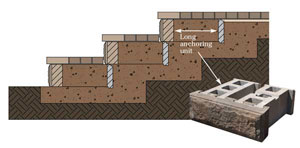
When building stairs, use the long anchoring units (LAU) with the facing units for quick and easy installation.
Salt for Ice Removal
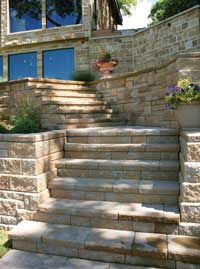
Stairs with AB Capstones
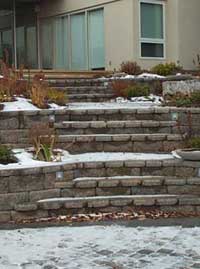
Stairs with AB Capstones
In colder climates, salt CANNOT be used on the blocks or AB Capstones as it will cause them to deteriorate. Use sand instead.
Stair Tread Options
- Allan Block's patented front lip provides a built-in edging that not only works well with AB Capstones, but also pavers, poured concrete, crushed rock, mulches and flagstones
- When using a rigid dimension tread material such as AB Capstones or landscape pavers, carefully plan the stair dimensions to reduce the amount of cutting required. Ensure stair treads are secured in place with a high strength construction adhesive for safe use.
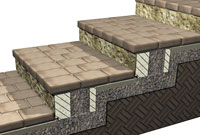
Stairs with Pavers
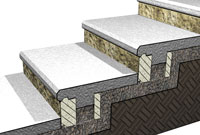
Stairs with Concrete
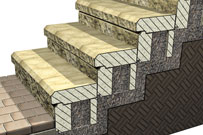
Stairs with AB Capstones
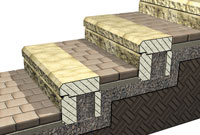
Stairs with AB Capstones and Pavers
Stair Applications
There are many different options available for stairs for your retaining wall project. Remember to always check the local building codes before construction.
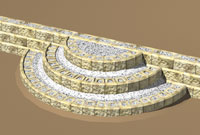
Curved steps parallel to retaining wall
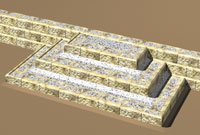
Square steps parallel to retaining wall
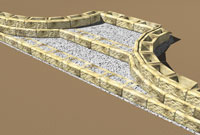
Curved steps into retaining wall face
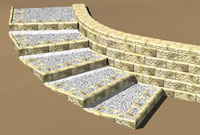
Curved steps with corners parallel to the retaining wall


