Grill out more often with an attractive and functional BBQ Grilling Station. Learn here just how easy it is to build. This project demonstrates how to build on a hard,level surface, such as concrete or pavers. You can build it on an existing surface like a patio or pavement, as well as on soil. If you will be building in an area that does not have an existing patio or pavement, see How-to Sheet #120 Building Wall Panels and How-to Sheet #220 Building Posts for more information.
Video: How to Build BBQ Grilling Station-VS 1
Video: How to Build BBQ Grilling Station-VS 2
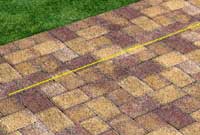
Mark the Location
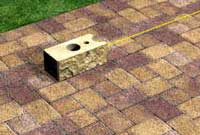
Place the First Corner Block
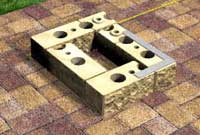
Align the Blocks with a Square
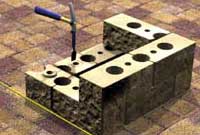
Remove the Raised Rings
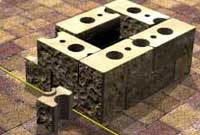
Finish with an AB Dublin
End-Split Block
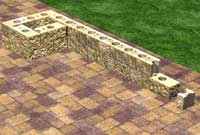
Build Wall Panel
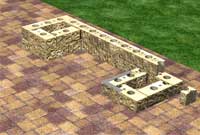
Start the Second Post/Pillar
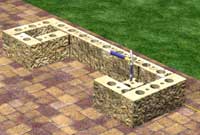
Remove Raised Rings & Build Second Course
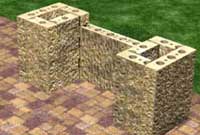
Continue Stacking Blocks to the Desired Height
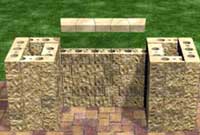
Set Wall Caps in Place
Add Countertops to Posts
Step 1: Build the First Post/Pillar
Mark out the location of your grilling station. Draw an 87 in. (2.2 m) minimum guideline where the back of the BBQ grilling station will be constructed.
Place the first Corner Block on the guideline where you want to begin. Then place 3 more Corner blocks and 2 AB York blocks (Figure 1).
Use a square to line up the blocks to ensure your post/pillar is square. Remove the raised ring on one of the AB York Blocks using a hammer and chisel. This will provide a flat surface for the next course of blocks.
On the second course, place 4 Corner blocks so that they offset the blocks beneath them. Split an AB Dublin end-split block and place the large piece with the raised rings facing down and the split side against the Corner block (Figure 2). Save the smaller piece to be used at the end of the wall panel.
Step 2: Build the Wall Panel
Begin the wall panel by installing the first 2 courses at the same time, using the patterns shown (Figure 3), or one you have chosen. In this example we are alternating between AB Dublin and AB York blocks.
Building the first 2 courses at the same time will ensure that the blocks line up properly. End the base course of the wall panel with a Corner block. End the second course of the wall panel with the remaining small piece of the AB Dublin end-split block used on the post/pillar (Figure 3).
Step 3: Build the Second Post/Pillar
Continue building the second post/pillar by placing 3 additional Corner Blocks and 1 AB York block as shown (Figure 4).
Use a square to position the blocks. Remove the raised ring on the AB York block with a hammer and chisel. Build the second course of the post/pillar by placing 4 Corner blocks starting with the first Corner block against the small piece of the AB Dublin end-split block (Figure 5).
Step 4: Continue Building
Continue stacking courses by repeating Steps 1-3 until the desired height is achieved. This example uses a total of 5 courses, plus one additional course of 5 Corner blocks to each post/pillar. The wall panel is one course lower than the posts/pillars to allow for movement of the grill hood (Figure 6).
Step 5: Finishing the BBQ Grilling Station
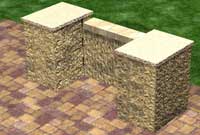
Place Wall Caps on top of the wall panel by alternating the caps to keep a straight line. Secure the caps in place with masonry adhesive. Choose a countertop material to fit your design (Figure 7). Set your countertops in place and check for level. Shims may be used if adjustments are necessary. Secure the countertops in place with masonry adhesive, move the grill into place and you are ready to fire up the grill!
The dimensions of this BBQ grilling station used in this example are 36 in. H x 30 in. D x 87 in. W (0.9 m H x 0.8 m D x 2.2 m W) using a 39 in. (1.0 m) wide grill. To build using a different size grill, see (Figure 8) for information on other grill widths.
| Figure 8: Block Counts for Common Grill Widths* |
| Block Type |
30 in.
(762 mm) |
39 in.
(0.99 m) |
48 in.
(1.2 m) |
| AB York |
26 |
21 |
26 |
| AB Dublin |
7 |
12 |
12 |
| Wall Caps |
4 |
5 |
6 |
| Corner Blocks |
50 |
50 |
50 |