Enhance your patio and create more seating areas with a beautiful outdoor couch using the AB Courtyard Collection. With this flexible system you can build an outdoor couch in just a weekend. This project demonstrates how to build on a hard, level surface, such as concrete or pavers. If you will be building in an area that does not have an existing patio or pavement, see How-to Sheet #120 Building Wall Panels and How-to Sheet #220 Building Posts for more information.

Video: How to Build an Outdoor Couch
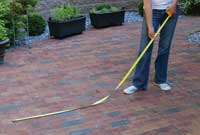
Mark the Location
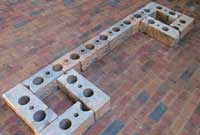
Build the First Course
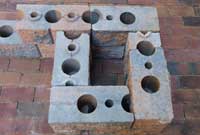
Build the Second Course

Build the Third Course

Build the Fourth Course
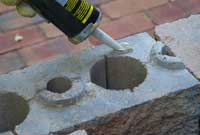
Secure Blocks with Adhesive
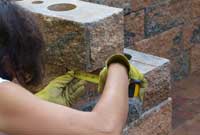
Measure the Corner Block
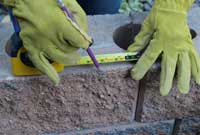
Mark & Cut the Corner Block
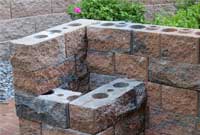
Build the Back Rest
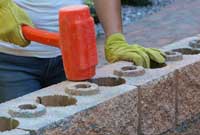
Adjust Blocks if Needed
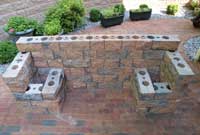
Build Last Course of the Back Rest
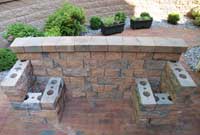
Finish With Wall Caps
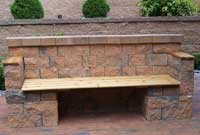
Complete the Seat & Arm Rests
Approximate Dimensions
40 in. H x 27 in. D x 88 in. W
(1.01 m H x 0.70 m D x 2.2 m W)
Materials Needed:
Couch Frame
- 29 AB York Blocks
- 14 AB Dublin Blocks
- 8 AB Dublin cut at raised ring
- 28 Corner Blocks
- 2 Custom Cut Corner Blocks
- 11 Wall Caps
- Flexible Concrete Adhesive
Arm Rest Covers and Seat
- 2 Cedar Studs - 2 in. x 4 in. x 22 in. (50 mm x 100 mm x 560 mm)
- 4 Cedar Planks - 1 in. x 6 in. x 73 in. (25 mm x 150 mm x 1.86 m)
- 2 Cedar Planks - 1 in. x 8 in. x 20 in. (25 mm x 200 mm x 510 mm)
Tools Needed:
- Tape Measure
- Masking Tape
- Chalk Line
- Hammer & Chisel
- Masonry Saw
- Safety Glasses
- Dust Mask & Work Gloves
Step 1: Mark Your Layout
Determine the location of your outdoor couch. Remember to leave enough space around the couch area to accommodate for walking space and any additional furniture or seating. Then draw a guideline using chalk or tape where the back of the couch will be constructed.
Step 2: Build the First Course
Layout the first course of blocks as shown in Layout 1. Some blocks will need to be either cut or split on each course. Use a square to line up the blocks to ensure your corners are square. Two AB York Blocks and two AB Dublin Blocks will need to be cut or split on this course. Save the second half of these blocks to use on the next course. Learn more on splitting and cutting blocks.
Step 3: Layout the Second Course
Begin laying out the second course as seen in Layout 2. Use the remaining AB Dublin End-Split pieces from the first course. You will need to split 2 AB Dublin Block to complete this course. Save the remaining split pieces to use on the next course. The AB Dublin End-Split pieces will need to be installed upside down or the raised rings will need to be removed to allow placement of the bench.
Step 4: Build the Third Course
Continue building by stacking up the third course by repeating the layout from the first course (Layout 1). Use the remaining end-splits from the second course to complete the third course.
Step 5: Build the Fourth Course
Once you have completed building up to the third course it is time to begin the arms and back rest of the couch. Following Layout 4, stack the fourth course of blocks. You will need to secure these blocks to the course below using a bead of masonry adhesive on each side of the raised rings.
Step 6: Build the Back Rest
Continue building the back rest by installing the fifth course (Layout 5). On this course the corner blocks on the ends will need to be cut to complete the arm rests. Learn more on splitting and cutting blocks.
Step 7: Cut the Corner Blocks for the Arm Rests
To cut the corner blocks for the arm rests, begin by placing the corner block in place. With a measuring tape, measure the distance from the end of the corner block to the end of the course below. Mark this measurement on the back of the corner block from the tapered end on each side. Strike a line between the marks and use as a guide line for cutting. Use a circular saw with a masonry blade to cut the corner blocks. Once the piece is cut to the desired length, secure it in place with masonry adhesive.
Step 8: Build the Last Course
Install the final course of blocks for the back rest using the layout in Layout 6. Adjust the blocks as necessary to ensure a straight back to your couch. Secure this final course to the blocks below using a bead of masonry adhesive on each side of the raised rings.
Step 9: Finish With Wall Caps
Once you have reached the desired height, it is time to finish the back rest with Wall Caps. Place each Wall Cap, alternating each one as you move down the back rest. Make adjustments as necessary to ensure the Wall caps are straight. Then secure each wall cap in place with a bead of masonry adhesive on each side of the raised rings and along the side of each Wall Cap.
Step 10: Choose Material for Couch Seat
Now that the construction of the couch foundation is complete, it is time to finish the arm rests and seating area. Choose a material that fits your design. In this example we used wooden planks of cedar to create both the arm rest covers and the seating area.
Step 11: Build the Arm Rests
To construct the arm rests you will need 2 pieces of cedar cut to the dimensions shown in Figure 1. Seal the wood with a sealant designed for the outdoors to protect the wood from the elements. Allow this to dry thoroughly before installing the arm rests. Place the arm rest covers onto the arm rests. You can secure these in place with a bead of masonry adhesive.
Step 12: Construct the Couch Seat
To construct the seating bench you will need 4 pieces of cedar planks and 2 pieces of cedar studs cut to the dimensions shown in Figure 2. You will want to double check the dimensions of your bench by measuring the distance between the arm rests of the couch frame. Like the arm rests you will want to seal each piece of wood with an outdoor sealant designed for wood (prior to construction is recommended).
Assemble the seating bench as shown in Figure 2 and seal each piece with a outdoor sealant. Then set in place on top of the couch. You can finish your couch off with decorative pillows or cushions to fit your style. Now you are ready to sit back and relax on your new outdoor couch.