Enhance your home in just a weekend with a dramatic entry monument that can be installed directly on patios or pavement as well as on an unfinished surface such as sod and soil. This project demonstrates how to build on an unfinished surface by creating a foundation pad. See How-to Sheet #120 Building Wall Panels and How-to Sheet #220 Building Posts for instructions on building the base.
Poor soil conditions under the foundation pad may require additional attention. See adding stability to posts/pillars for more foundation information.
Step 1: Layout the First Course
Begin by laying out the entire first course of blocks, as a guide for where the sod and soil will be removed to construct the base. To do this you will need to split an AB York center-split block and place one half on each end of the wall panel. See splitting blocks for additional instructions. Then use a shovel to cut around the blocks to mark the layout.
Step 2: Remove Sod and Soil
Set aside the first course of blocks. Remove the sod and soil in the area marked. For the post/pillar locations dig a hole 24 in. (600 mm) square, by 4 in. (100 mm) deep (Figure 1).
For the wall between the posts/pillars, dig a trench 3 in. (75 mm) deep to match the width and location of the blocks (Figure 2).
Step 3: Prepare Foundation Pad
Next, prepare the foundation pad. Place 4 in. (100 mm) of base rock for the post/pillar locations and 3 in. (75 mm) in the trench between the posts/pillars. Thoroughly compact with a hand tamper. Level the pad in all directions, making sure the transition between the post/pillar and wall foundations are at the same height and level with each other.
*NOTE: The soil beneath the foundation pad must be a good quality compactable material. If soft soils are encountered, they will need to be removed and replaced with additional base rock. A good foundation will ensure a stable post/pillar for years to come.

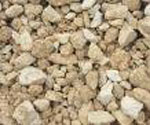
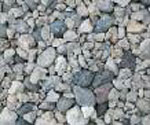
 Road/Paver Base Wall Rock
Base Rock: Using the proper materials to create the base foundation for the panels is important when building on soil. We recommend using a compactible base rock material that is gravel in varying sizes of angular or smooth aggregates similar to the wall rock used in retaining walls or a road/ paver base type material.
Step 4: Build the First Post/Pillar
The first post/pillar is the tallest of the two posts/pillars to be constructed. Begin the base course by placing 4 Corner Blocks with the long sides facing out. Align the blocks with a square, and level with a dead blow hammer.
Place the second course of Corner Blocks on the post/pillar by alternating the pattern to offset the vertical seams. Continue stacking a total of six courses, alternating the pattern on each course.
Step 5: Build the Wall
Now we are ready to build the wall. For the base course, split an AB York center-split block and place the split side against the post/pillar, as shown in Layout 1. Install the six AB York blocks needed to build the base course. Use the other half of the AB York center-split block to finish the base course by placing the split side against the next post/pillar. On the second course, no splitting will be needed, just place seven AB York blocks (Figure 2).
Note: Building two courses at a time will ensure proper alignment.
Step 6: Building the Second Post/Pillar
The second post/pillar will be shorter than the first post/pillar. Build the second post/pillar at the end of the curved wall. Again, place 4 Corner Blocks with the long sides facing out, making sure they are tight against the split block of the wall base course. Align the blocks with a square, and level with a dead blow hammer. Continue stacking a total of four courses, alternating the pattern on each course.
Step 8: The Step Down
The step down will be accomplished over two courses. Begin to step down the wall on the third course. The third and fourth courses will only touch the taller post/pillar. Split an AB York center-split block and place the split side against the first post/pillar. Then place 4 AB York blocks to complete this course. For the top course, place 2 AB York blocks against the first post/pillar to complete this course. This will give you a gradual step down effect to the second post/pillar.
Step 9: Finishing Post/Pillar
Finish the posts/pillars with Post Caps. Apply a bead of masonry adhesive near the outer edge of each Corner Block and place the caps on top of the post/pillar.
Step 10: Finishing the Wall
Finish the wall with Wall Caps. Where the wall steps down stack two caps on top of each other for a more gradual look. There will be some small gaps between the caps that can be filled by cutting caps to fit. When cutting caps to fit, first score the top using a saw with a masonry blade. Place the split caps on the wall with the split side facing in and the finished side facing out against the post/pillar. Click on splitting caps for additional information.
Step 11: Apply Adhesive to Caps
Apply a bead of adhesive along the front and back edges of the blocks and under the additional step-down caps.