Finishing Your Retaining Wall
Allan Block offers a great variety of finishing options for your retaining wall. If you are building with AB Fieldstone that uses recycled materials, go to finishing with AB Fieldstone.
Step Downs/Turn-Ins For AB & AB Europa Walls
Stepping Down Your Retaining Wall
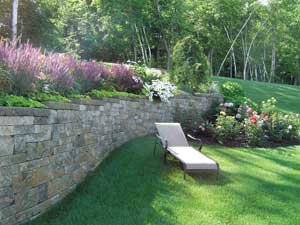
Patterned retaining wall with step downs
Walls with step downs can be easily finished by adding an additional capstone or a half high block, or turning the ends back into the hillside.
- For a gradual step down, use the half-high blocks - AB Lite Stone from the AB Collection or AB Barcelona from the AB Europa Collection.
- For a full course step down, use the AB Corner Blocks from the AB or AB Europa Collection or for AB Fieldstone see below for details.
- For a step down that doubles as a planter, turn the wall in 2 or 3 blocks after a corner.
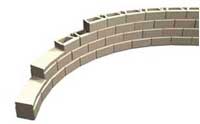
- Create a soft ending to the wall by using an inside curve while stepping down.
Retaining Wall Turn-ins
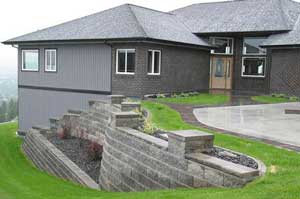
Retaining wall with turn-ins
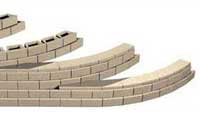
The simplest and easiest method of ending an Allan Block retaining wall is to use smooth flowing curves that turn back into the hillside. The benefits of curving the retaining wall back into the hillside include:
- For a graceful, flowing end to the wall, curve the wall to create a plantable area that can soften the look of the retaining wall.
- For a natural flow into the landscape curve the wall back into the hillside. TIP: The benefits of curving the wall back into the hillside include:
- Less Time and Expense to Build
- No Need for Corner Blocks
- Superior Erosion Control
- Attractive Design
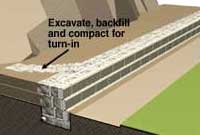
When building a turn-in, a base trench will need to be excavated, backfilled and compacted, the same as the base course of blocks.
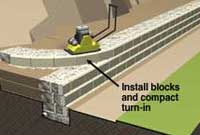
Install blocks and compact turn-in
Retaining wall with turn-ins
Proper backfilling and compaction is important, where the wall turns back into the slope. To ensure the turn-in area doesn’t settle differently than the rest of the wall, make sure the entire area below the new base is compacted thoroughly.
Step Downs with AB Fieldstone
Stepping Down Your AB Fieldstone Retaining Wall
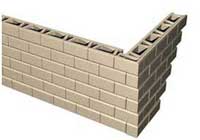
Creating a step down is similar to building an outside corner as it uses the same facing units that are manufactured with a textured side and has the same placement of the anchoring units.
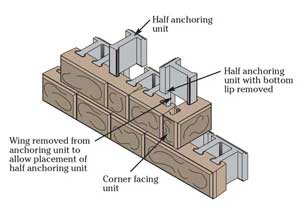
- Install the facing units up to the step down location. Install the facing unit with the textured end perpendicular to create a corner, with the textured face placed to face out.
- Split an anchoring unit in half. Take one half and remove the bottom lip and place in the facing unit that was used to create the step down. See modifying blocks for details on modifying an anchoring unit.
- The next anchoring unit will be installed in the first two facing units that lead up to the step down. This anchoring unit will span two facing units. One of the wings of this unit will need to be removed to allow placement.
- Use the other half of the previous anchoring unit in the next slot to get pattern back so each facing unit has its own anchoring unit.
- Use a flexible masonry adhesive to secure the corner units in place.
See more options for finishing your retaining wall.
Capping AB & AB Europa Walls
Capping Retaining Walls
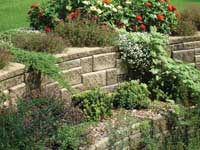
Retaining wall finished with capstones
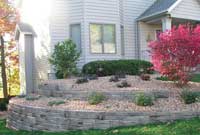
Retaining wall finished with rock
Allan Block Capstones are available to finish the top of the wall. Capstones can be modified to fit any retaining wall shape. Learn how to cut capstones for curved retaining walls as well as retaining walls with corners.
Finishing walls with Plantings or Mulch
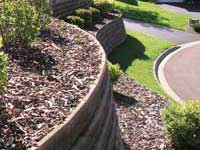
Finish retaining wall with mulch
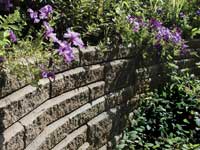
Top retaining wall with plants
Allan Block's patented raised front lip provides a perfect built-in edging where you can simply use rock, mulch, grass or planting soil to complete your retaining wall with an attractive, natural look.
Capping AB Fieldstone
Finishing an AB Fieldstone Retaining Wall
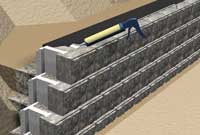
Install filter fabric
Filter fabric is used on top of the top course of blocks and below the caps to cover the back of the AB Fieldstone anchoring units. This will allow plantable soil to be placed flush against the cap unit.
- Place a strip of filter fabric along the top of the AB Fieldstone anchoring units on the top course of wall. Position so that the fabric starts at the back of the AB Fieldstone facing unit and goes over the AB Fieldstone anchoring unit and down along the back of the anchoring unit.
- Be sure to leave the top surface of the facing unit exposed so that the cap sealant can be placed on the facing unit.
- Finish the wall with AB Capstones. Place the first capstone on the wall to include a 1.5 - 2 in. (40 - 50 mm) overhang.
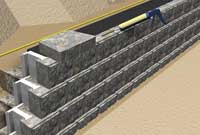
Secure retaining wall caps
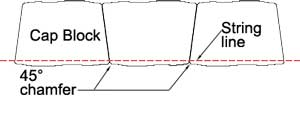
AB Fieldstone Cap
- Run a string line the length of wall to mark placement of additional capstones.
- To get a consistent point, use the 45° chamfers at the end of each cap as alignment points for string line.
- Use a flexible masonry adhesive, NP1 or equivalent, to secure the capstones in place. Put a small bead of sealant along the sides of the caps as well.
- Backfill behind the last course and behind the AB Capstone with impermeable fill to allow for planting up to the back of the wall.
- Note: To help hold the filter fabric in place while backfilling, place a spot of sealant between the fabric and the anchoring unit.
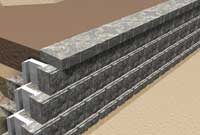
Install caps to create shadow line
Capping Step-Downs
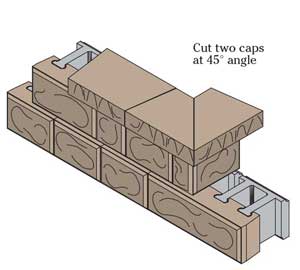
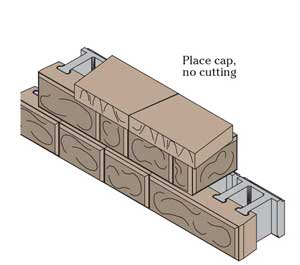
Capping for step downs can be done two different ways. Using the AB Fieldstone cap with and without cutting.
When placing caps on the wall, caps should be installed to overhang the front of the blocks. This accentuates the wall with a nice shadow line.

