How to Build a Bond Beam
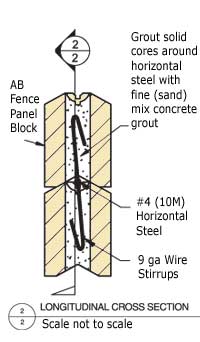
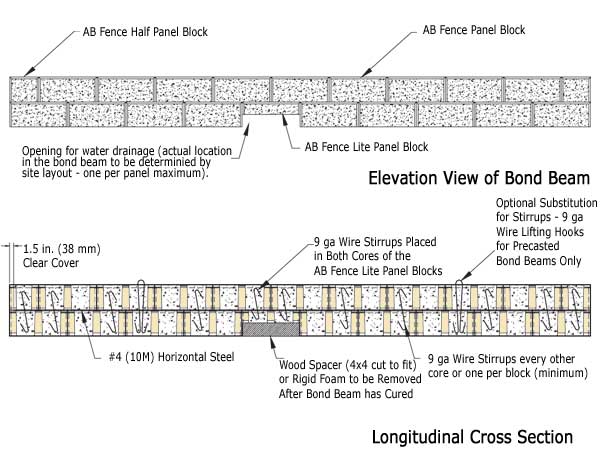
Logitudinal Cross Section
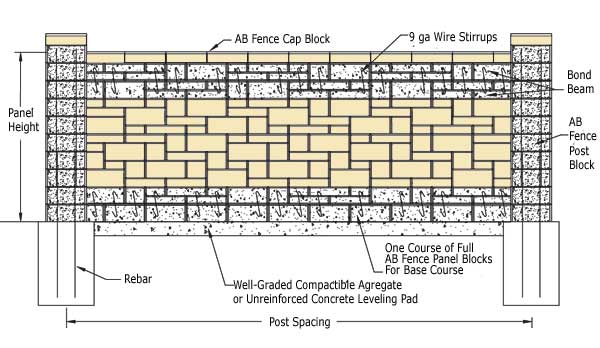
A single bond beam consists of two courses of AB Fence Panel Block that have their cores filled with sand mix grout. Horizontal steel is placed between the two courses of block and will reinforce the entire bond beam. For additional support, wire stirrups are placed in each of the first two cores from each end and approximately every other core with one stirrup per block minimum, to ensure that the courses do not separate (ashlar patterned bond beams will require more vertical stirrups). This bond beam configuration creates a solid structural beam capable of reinforcing the fence panel structure. Bond beams are used at the top and bottom of the fence panel to create a unified fence panel structure. Intermediate bond beams are required as the AB Fence height increases.
- Place first bond beam course, lay in rebar on the top of the blocks. Rebar is commonly available at local suppliers in 10 ft. and 20 ft. sections (3 m and 6 m).
- Place second bond beam course.
- Using funnel, start filling the blocks with grout.
- Place stirrups in blocks.
- Consolidate grout with a concrete vibrator.
- Place additional grout to top off blocks after vibrating.
- Entire bond beam must be cast at the same time.
- Allow finished bond beam to cure four hours before stacking additional courses.
Standard Fence Bond Beam
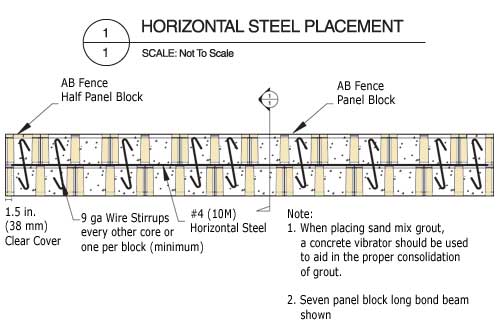
Note:The AB Fence uses two different types of concrete during construction. The piles and AB Fence Post Blocks use concrete with gravel and sand size aggregate. This type of concrete is generally available from concrete plants and used in most types of construction. However, the bond beams require what is referred to as a fine mix concrete grout. This mixture of concrete uses only sand as the aggregate, which makes it ideal for filling the smaller cores of the AB Fence Panel Block.

Stirrup Jig For 2 Course Bond Beam
Ashlar Pattern Bottom Bond Beam Placement
Note:Install stirrups as described above prior to vibrating. This will ensure a quality bond beam for maximum stability. Learn more on constructing a jig for the stirrups.
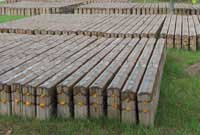
Pre-Made Bond Beams
Pre-Made Bond Beams
Bond Beams can be pre-made offsite and installed using a lift to hold the bond beam while it is lowered into place.
Drainage Detail
Bond Beam Considerations For Patterned Fences
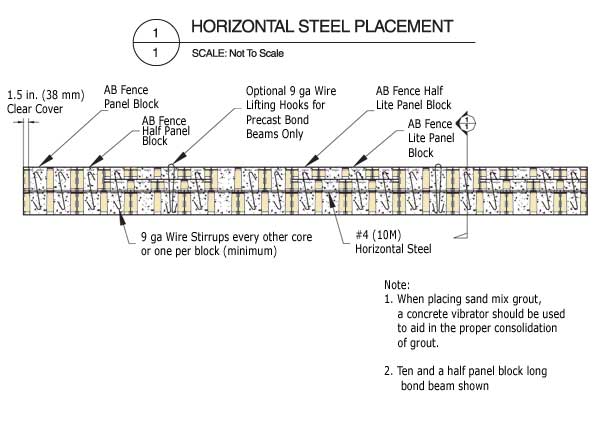
When building a patterned fence, the bond beam can be constructed either with full height blocks as shown in the Standard Bond Beam Construction detail, or by using the single course pre-set pattern as depicted in the Patterned Bond Beam Construction detail shown below. Proper consolidation of the concrete grout as well as placement of the horizontal steel and wire stirrups are required for both options. Wire stirrups are needed in each of the first two cores from each end and in every other core or one per block (min). A concrete vibrator is required when placing concrete.
AB Ashlar Blend Pattern Fence - Standard Bond Beam Construction
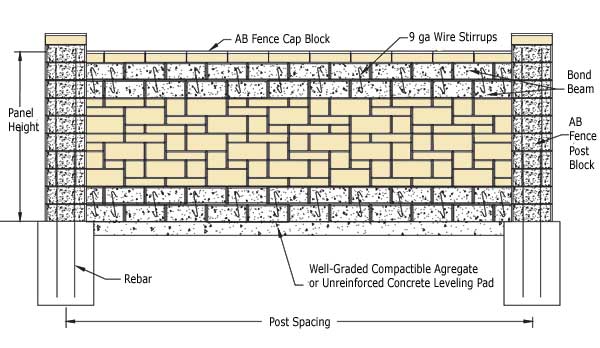
AB Ashlar Blend Pattern Fence - Patterned Bond Beam Construction
