Fence Installation: Piles
Step 1: Pour Concrete For Fence Piles
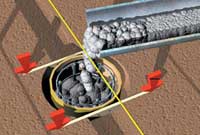
Step 1: Pour Concrete
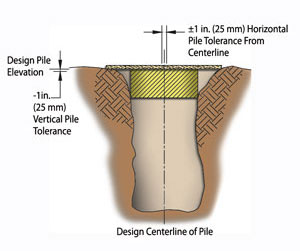
Pile Construction Tolerances
Pour concrete meeting or exceeding the minimum strength requirements specified in the approved construction design into the fence pile holes.
During the pour of each fence pile, ensure that the concrete form is braced to maintain the correct elevation and horizontal location. Double check with laser and hand levels to maintain tolerance; minor adjustments will have to be made during the pour.
- Horizontal Tolerance: ±1.0 in. (25 mm)
- Vertical Tolerance: -1.0 in. (25 mm)
Finish concrete using a hand trowel or other equipment to create a flat surface for post placement. For mixing and placing concrete in cold weather check out AB Fence Tech Sheet #2006.
Step 2: Set Rebar
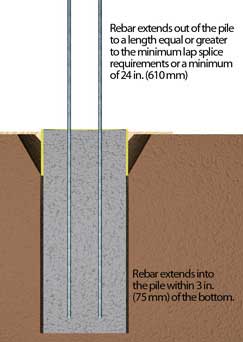
Step 2: Correct Rebar Placement
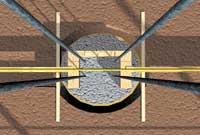
Step 2: Set Rebar with Spacing Jig
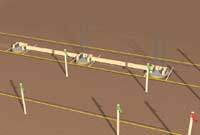
Step 2: Set Rebar with Spacing
Jigs on Piles
Immediately following the concrete pour, relocate the center of the AB Fence post using the AB Fence Pile Layout Jig, shown in Figure 1, and make an impression in the wet concrete to mark it.
Place the vertical steel reinforcement bars (rebar) using the Post Block Template with Piles Steel Placement shown in Figure 2; or for greater accuracy use the optional Rebar Alignment Jig shown in Figure 3. Pay close attention to make sure that the center of the template is at the center of the AB Fence post and square to the adjacent AB Fence post. This can be done using offsets and string lines.
The rebar must be placed to ± 0.5 in. (13 mm) of the design’s horizontal location. When placing rebar, a tolerance of ± 0.5 in. (13 mm) must be maintained to allow for proper interlock between post and panel sections.
The rebar must extend into the pile to the depth specified in the approved construction design, but maintain a 3 in. (75 mm) clear cover at the bottom of the pile.
The rebar should extend out of the top of the pile to a length equal to or greater than the minimum lap splice requirements set by the approved construction design or a minimum of 24 in. (610 mm).
Step 3: Set Fence Posts
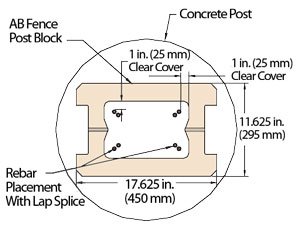
Post and Rebar Placement
Before setting any AB Fence Post Blocks, allow the concrete to harden approximately four hours, or until hard enough to resist more than surface scratching when scraped with rebar.
Note:The AB Fence uses two different types of concrete during construction. The piles and AB Fence Post Blocks use concrete with gravel and sand size aggregate. This type of concrete is generally available from concrete plants and used in most types of construction. However, the bond beams require what is referred to as a fine mix concrete grout. This mixture of concrete uses only sand as the aggregate, which makes it ideal for filling the smaller cores of the AB Fence Panel Block.

