How to Build Patterned Fence Panels
Patterned fence panels resemble hand-laid stone walls and add even more character to the AB Fence System and require a higher level of detail and craftsmanship to construct than the standard fence panel. Plan on taking a little extra time to build a patterned fence, particularly when building one for the first time.
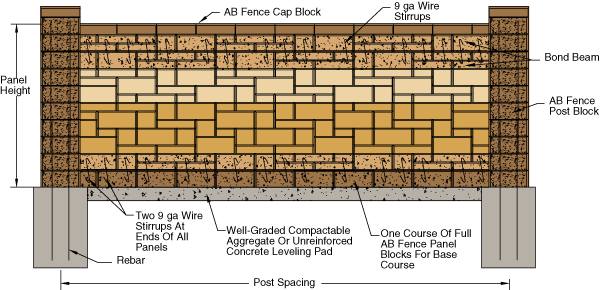
AB Ashlar Blend™ Fence Panels
Wall Patterns
To assist in fence estimating and to ease the construction process there are pre-set fence patterns available. A pre-set pattern is repeated for a particular pattern height and length. Remember, a single course consists of a full size AB Fence Panel block, approx. 8 in. tall (200 mm). Combine the different pre-set patterns to build any height fence required. These pre-set patterns can be flipped or reversed to keep the fence panels random. For additional tools for estimating your project, download the FREE AB Estimating Tool.
Standard Single Course Pattern

2 Panel Blocks
2 Half Panel Blocks
6 Lite Panel Blocks
4 Half Lite Panel Blocks*
Standard Two Course Pattern

6 Panel Blocks
4 Half Panel Blocks
8 Lite Panel Blocks
8 Half Lite Panel Blocks*
Standard Three Course Pattern

10 Panel Blocks
10 Half Panel Blocks
10 Lite Panel Blocks
4 Half Lite Panel Blocks*
Standard Four Course Pattern

15 Panel Blocks
12 Half Panel Blocks
10 Lite Panel Blocks
8 Half Lite Panel Blocks*
* Check with your local manufacturer on availability. In areas where the AB Half Lite Panel Block is not produced, use an AB Fence Lite Panel Block cut in half to create two AB Fence Half Lite Panel Blocks.
Patterned Fence Panel Construction
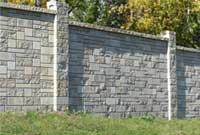
Ashlar Blend Pattern Concrete Fence
For a detailed description on how to start fence construction, start with the layout of your fence. The initial steps include proper layout of the fence, jig construction, placement of the concrete forms, construction of the pile footings, location of the rebar within the pile footings, trench preparation and initial block coursing of posts and panels.
Note: The base course of the panel should always use a full course of the AB Fence Panel Block. This will speed the leveling and installation of the panel.
The following steps will compliment the installation procedure outlined on the standard fence installation. The changes to the typical installation for the construction of a patterned fence are as follows:
Step 3: Post and Patterned Panel Construction
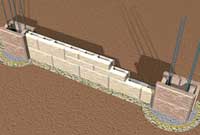
Step 3: Install First Course of the Pattern
- Stack a second course of panel blocks following the pre-set single course pattern. Repeat the pattern if the panel is longer than 10 ft (3.0 m). If a manufactured AB Fence Half Panel Block is not available, an AB Fence Panel Block must be cut to obtain two half panel blocks using a concrete saw and diamond blade. By following the pre-set single course pattern the bond beam will still consist of two full courses.
- Check the first two courses of panel block for alignment and plumb. Shim and adjust as necessary.
- Additional vertical stirrups will be needed to meet the one per block minimum. Additionally, a vertical stirrup should be placed in each of the first two cores at each end of the bond beam. Continue with Steps 4-5 of fence post and panel construction to continue.
Step 6: Post and Patterned Panel Construction
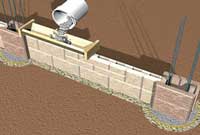
Step 6: Install Grout for Bond Beam
Step 6: Place grout Stop Material
Vertical Panel Tolerance
- Using the pre-set patterns in any combination, stack the fence panel blocks in between the post columns up to the course below the top bond beam. For example, if there are seven courses between the bond beams, use a combination of the 4-course and 3-course pre-set patterns. The fence panel blocks should be stacked tight, paying attention to level and plumb.
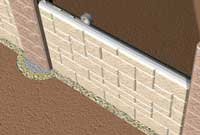
- Before stacking the top two courses, place a 4 in. (100 mm) strip of grout stop material, such as duct tape or building paper.
- Using the pre-set single course pattern, stack the first course of the next bond beam directly on top of the grout stop material.
- Place a continuous piece of #4 (10M) rebar for the horizontal bond beam on the recess on top of the AB Fence Panel Block.
- Stack the second course of the next bond beam using the single course pre-set pattern. This patterned course should be offset or flipped from the pattern below to avoid a repetitive look.
- Seat and straighten the fence panel with a 4 ft level and a dead blow hammer by striking the front and back sides of the fence panel.
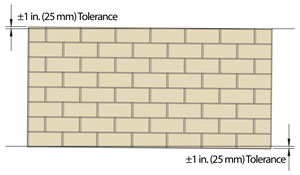
- Fence panels must be installed to a tolerance of +1 in. (25 mm) in the vertical direction over the length of fence panel.
- Follow Steps 7-8 of fence post and fence panel construction to continue.

