Building Jigs and Other Construction Tools
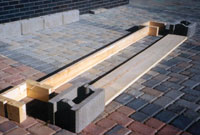
Fence Jig
Concrete Fence Jig Construction
AB Fence is designed to utilize the advantages of dry-stacked masonry. This mortarless technology provides an efficient and easy installation process. Before you start building, put these simple tools together to make the job go much smoother.
Pile Layout Jig
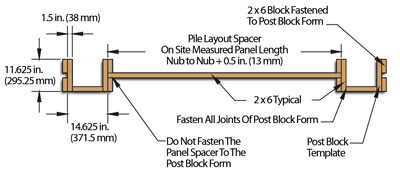
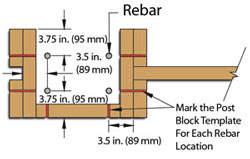
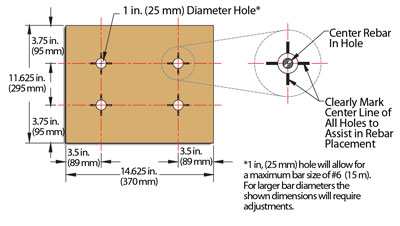
The pile layout jig (Figure 1) is used after the piles are poured, but not quite hardened to set the location of the fence post blocks on the piles and ensure the exact relative spacing between each AB Fence post. This will also indicate precisely where the rebar needs to be placed in the piles (Figure 2). The optional rebar alignment plate can be used for increased accuracy of bar placement, see Figure 3.
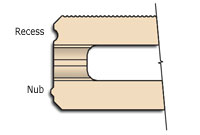
Top View of Fence Panel Block
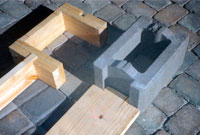
Fence Post Jig
To ensure an accurate pile layout spacer, line up the number of panel blocks you are using on a flat surface and measure the actual panel length nub to nub. Use this field-measured length to assist in pile spacing and in constructing the spacers in Figure 1 and 4.
Using 2 x 6’s construct two post block templates as shown in Figure 2. After measuring the exact panel length, nub to nub, cut a 2 x 6 to this length plus 0.5 in (13 mm) extra to account for the required space between panel block and post pocket. This 2 x 6 is the Pile Layout Spacer shown in Figure 1 and is used between the post block templates.
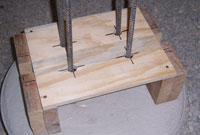
Rebar Alignment Jig
Post Spacer
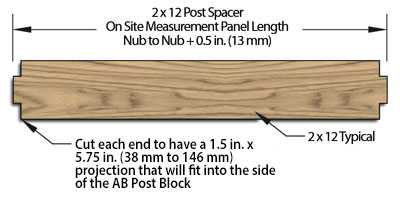
The 2 x 12 post spacer (Figure 4) is used to help keep the AB Fence Post Blocks square and aligned as the posts are positioned on the pile and as additional post blocks are being stacked.
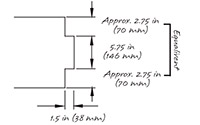
Figure 5: Post Spacer End Detail
Using a 2 x 12, notch the ends as shown in Figure 5 to slide into the end of the AB Post Block. This spacer will help you keep the post blocks from being turned or twisted out of alignment and relative to each adjacent post.
Funnel
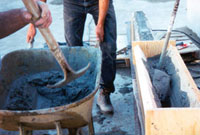
Grout Bond Beam Using the Funnel
Using a funnel to help direct the grout into the block cores will allow for easier installation and keep the grout off the block face.
Assemble two 2 x 6’s approx. 36 in. (915 mm) long for the side boards and two 15 in. (380 mm) long boards for each end as shown in Figure 6. Angle the side 2 x 6’s to match the top surface of the panel block. Leaving a 2.5 in. (65 mm) opening for the grout to Flow through. See Figure 6.
Stirrup Jig
Vertical steel stirrups are used in the bond beams to give added stability to the bond beam structure.
To assist with the production of required stirrups, construct the stirrup jig as shown in Figure 7.
A simple jig can be constructed using a wood base, two 1.5 in. (38 mm) dia. wood dowels and a set peg or screw. A stirrup is typically formed using 9 ga wire, and wrapped around the dowels to create an “S” shape. Making sure the final stirrup is at least 14 in. (355 mm) long for a two-course bond beam and 21 in. (533 mm) long for a three-course bond beam. More information on bond beam construction

